Showing posts with label makeovers. Show all posts

Wednesday, October 19, 2011

Upstairs Hall Makeover

I finished this ages ago, but just got it together to post about it. Typical.  So, this is what the upstairs hall looked like when I moved in this summer.
And this is what it looks like now.
I painted the trim, walls and shelves. For the back of the bookcase I used some subflooring and cut it to the size of the opening.  I then pasted a textured wall paper on to that. Here is a close-up of it unfinished.
I painted it light gray (I mixed some white trim paint with a little sample of black paint that I had left over), then used a metallic glaze over that. And because I'm ADD, I spray painted the hardware to match.
I have since then rented out my upstairs so now I don't even get to use it. Typical.

Tuesday, July 19, 2011

Hand-Me-Down Mirror Makeover

The former owners of my house left me this lovely (ugh) mirror.
 And this lovely eye sore above my mantle to go with it. I swear these people were the laziest homeowners ever!
 I taped off the mirror, primed it (shown below) and painted it "Ivory Brown" - a left over Valspar sample I had from another project .
 I followed that up with two coats of a craft paint in a metallic finish called "Champagne" that I picked up on sale for 75 cents. Voila - a glamorous mirror for my glamorous guest bedroom! Best 75 cents I've ever spent.

Hand-Me-Down Dresser Makerover

Among the massive amount of furniture and whatnot left in my house by the previous owners was this dresser.  It's functional, but not really my style at all.


I wish I could take credit for this idea, but I can't.  Not long after moving into the house and acquiring this hand-me-down dresser, I read about this dresser makeover and thought I'd give something similar a try. I figured even if I spent $100 making over this dresser to go in my guest bedroom, it's still cheaper than buying a new one and I get a one of a kind, custom piece of furniture out of the deal.  So why not?

First, I removed the old knobs and pulls and filled the holes with wood filler.


I then gave the dresser a quick once over with the orbital sander and applied two thick coats of an oil based primer, just like Kate from Centsational Girl said to do.  I always wondered how to get a nice clean even surface when painting wood furniture, and this is it. Two coats of an oil based primer followed up with a quick sanding makes the most lovely surface for painting.

Next I went about painting the dresser, applying two coats (three where necessary) of Olympic's "Delicate White" paint. I used a semi-gloss because I wanted a high shine surface when I was finished.  Also, the insides of the drawers had seen better days, so I measured them and then cut some wallpaper I had lying around from a previous makeover to fit inside the drawers.

I used a glue stick to glue them down, and voila! I like the effect. It's a nice surprise when you open the drawers to find a little sparkle waiting for you.

I finished it off with a couple of coats of Polycrylic to protect the paint job - one coat on the body, two and the drawers, and four (two then sand, then another two!) on the top since it will see the most wear and tear.

Finally, I ordered some lovely glass knobs and pulls from Cool Knobs And Pulls (CKP). This was by far the most expensive part of the makeover. But seriously, after putting in a ton of hours painting this thing, it was worth it to me to splurge a little on the knobs and pulls, which, with shipping and handling, came to not quite $90.

Here it is in it's new home, the upstairs guest bedroom, just waiting for some friends to visit and put it to good use.  Until then, it'll will just have to sit around looking pretty.


Tuesday, June 7, 2011

Upstairs Bedroom Makeover - Progress

This is what the upstairs bedroom looked like before I started working on it. None of this furniture is mine, these are photos from when the previous owner still occupied the house.


Yikes, right? Obviously, the mural had to go. The bedroom is medium sized, but has low ceilings and is oddly shaped. I wanted to open it up and at the same time give it some personality and impact. The blue paint, even though it's light, does not open up the room the way you'd hope. And the low, angled ceilings make it look dark and gloomy. Just in case you missed the glow-in-the-dark stars stuck to the ceiling, here is a close up.


Of the two upstairs bedrooms, this one has the least amount of closet space. Since closet space is scarce in this house, I decided that this room should be the guest bedroom. I live near Myrtle Beach, so I expect to (more like would like to) have multiple guests in the future and I thought it would be nice to be able to sleep more than one person in this room. Lucky for me, the previous owners conveniently left two twin beds when they moved out.

In the unlucky column goes the framing around the windows. All three windows are in this condition. It makes me want to rip my hair out. Even though I love fixing this place up, I hate the part where I have to go back and fix all the stupid shit other people have done to it.  After much debate, I decide to just leave the molding alone and reframe the windows at a later date, i.e. when I have the money to do it.


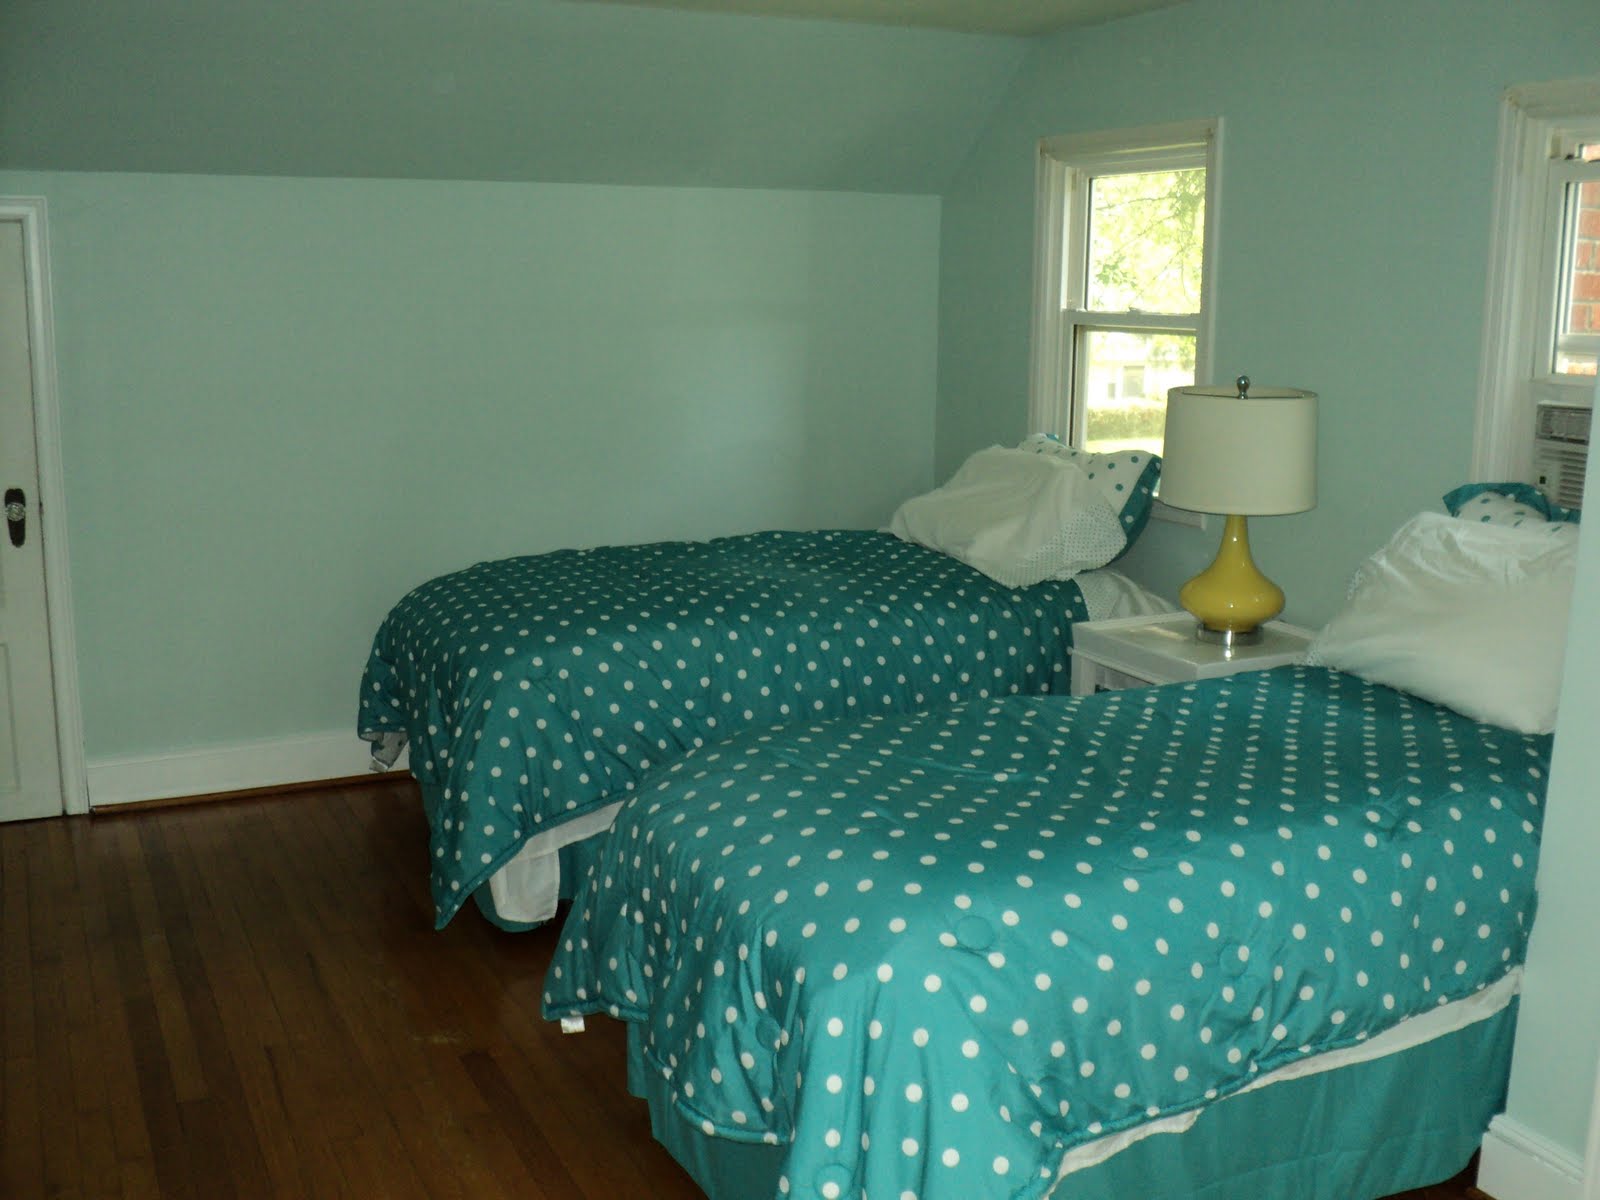
Now, for the fun part! Seeing some progress! I agonized over what color to paint this room and finally settled on "Tranquility" by Valspar. I like this color so much, I'm going to use it in the master bedroom, too. I think that it makes the room look like a little jewel box and I love it. I'm really happy about the decision to take the wall color all the way up the angled portion of the ceiling. I think it makes room appear taller and less crowded.


Although you can't see it in these pictures (which is probably a good thing, because it's not done yet, shhhh!), I painted the ceiling in Valspar's "Botanical Bath," which is a very pale green. I've never painted a ceiling before and I really like the effect. I'll post pictures that show the ceiling when I get around to replacing the flush mount light. Until then, you'll just have to trust me that it looks great. The trim color is Olympic's "Delicate White." I used the same color on the dresser and I'm going to use it throughout the entire house.  It's slightly shy of pure white - just enough to take the glare off.


The best part is that all of the furniture in this room was free! The beds were left by the previous owners (I just updated the bedding) and the dresser, too.  The bedside table was a gift from a friend's move. Both the dresser and bedside table were updated by yours truly.  You can read about the Bedside Table Makeover here and the Dresser Project here (I'll put a link in when it's finished).

It's not perfect, but it is definitely progress! Here is what is left on the to do list for this room:
  • Rip down the old molding around the windows, replace it with new wood and paint it.
  • Window treatments! I'm thinking roman bamboo shades and airy white curtains.
  • Trade out the old sockets (they've been painted over!) and light switch for new ones.
  • Replace the outlet covers with new ones that have a satin nickel finish, which goes really well with the new paint color.
  • Finish painting the ceiling! I really wanted to get it all done before I moved in the furniture, but things don't always happen the way that you want them to.
  • Replace the yellow lamp with one that has a glass base and a white shade.
  • Hang some art or a mirror on the walls. Really, my only big complaint about the room now is that it is a wee bit stark.
  • Strip the doors of their old paint and repaint them to match the trim. This, actually, is going to be another project all on it's own, which I'll get to (hopefully) before the summer is over.
  • Replace the ceiling light! I'm thinking of something like this to finish off the jewel box feel I'm going for.
The room is a long way from finished (is anything ever finished?), but I feel like it's come a long way from where it started. 

    Tuesday, May 24, 2011

    Bedside Table Makeover

    I don't have a picture of this table before it was painted for the first time, but it was a dark wood with a geometric boarder on the top. It was a hand-me-down from my old roommate when I lived on A Street. I was unhappy with my original paint job. From afar it doesn't look so bad.


    But when you get up close? UGLY! Mostly because I'd layered primer and multiple coats of paint on it and it STILL had stains from the wood showing through! Here is a close up of the staining that I'm talking about. I've only attempted to paint wood furniture twice and this was once of those attempts. I'm hoping that this revamp will go better than previously.


    Like the trooper I am, I sanded it down to prep it for a re-painting. Have I mentioned how much I hate prep work? Here it is sanded down.


    Several cans of white spray paint, days, and coats of polyacrylic later, volia! It's going to go in the guest bedroom, you know, when that gets painted (roll laugh track).